2014. Nov. update
前言:
這邊的內本來是我學習Latex與revtex4-1的紀錄
想說,也許會對未來要寫論文的人有些幫助,
於是就再整理一下放在blog了。
當然,我現在也是個初學者,難免有不週延的地方,請多多包涵。
ps.revtex4-1 是 American Physical Society製作的documentclass(就是指一種文章的格式).
介紹:
期刊的文章,都是有很嚴謹的排版格式要求的,
另外不同的學科也會有不同的排版要求,像物理跟數學的paper就長得不太一樣。
一般來說,要寫一篇paper,我們會需要寫以及用到的功能有:
-- 寫Title
-- 寫authors
-- 寫authors' information (email, affiliation, homepage...)
-- 放圖片
-- 放表格
-- 放equation
-- 放footnote
-- 放reference
-- 放appendix
在APS的論文中還是two column的排版呢,
以上的排版工作,如果有MS word來處理,會搞死人的。
絕大部分的物理學家都是用Latex來寫論文的(不知道有人用tex嗎!)。
Latex是個很powerful的排版工具,但它需要花點時間學習,
這就像微積分是個很powerful的工具,但得花個一兩個學期才會搞懂怎麼用一樣。
當開始接觸Latex的人,可能會相當的頭痛。
也因此,陸續有些軟體像是Lyx, texmaker想要降低操作Latex的難度,
而提供使用者更方面的介面。
尤其是Lyx,介面與MS word很像,
一般使用者可以在幾乎完全不會Latex的指令下,享受Latex的功能。
revtex4-1的麻煩點:
雖然Lyx好用的不得了,但是Lyx對於revtex4-1的格式有部份不支援,
我自己碰過得問題:
1. Lyx 的documentclass選項中,沒有revtex4-1, 你要使用額外的Local layout.
這個revtex4-1.layout file 可以在這邊下載
下載後,把rextev4-1.layout放在跟你.tex檔相同的資料夾中,
開啟Lyx後選local layout,就可以用ctrl+R預覽成品了。
Preamble
    % Fix a bug in REVTeX 4.1
    \def\lovname{List of Videos}
    \@ifundefined{textcolor}{}
    {%
      \definecolor{BLACK}{gray}{0}
      \definecolor{WHITE}{gray}{1}
      \definecolor{RED}{rgb}{1,0,0}
      \definecolor{GREEN}{rgb}{0,1,0}
      \definecolor{BLUE}{rgb}{0,0,1}
      \definecolor{CYAN}{cmyk}{1,0,0,0}
      \definecolor{MAGENTA}{cmyk}{0,1,0,0}
      \definecolor{YELLOW}{cmyk}{0,0,1,0}
    }
|
ps. 這個revtex4-1.layout file中,我把原本內容的這段給刪掉了
因為,這段碼好像會一直讓編譯失敗
2. 作不出revtex4-1要求的作者格式
比方說,有superscript,加上一推affiliation的就做不出來
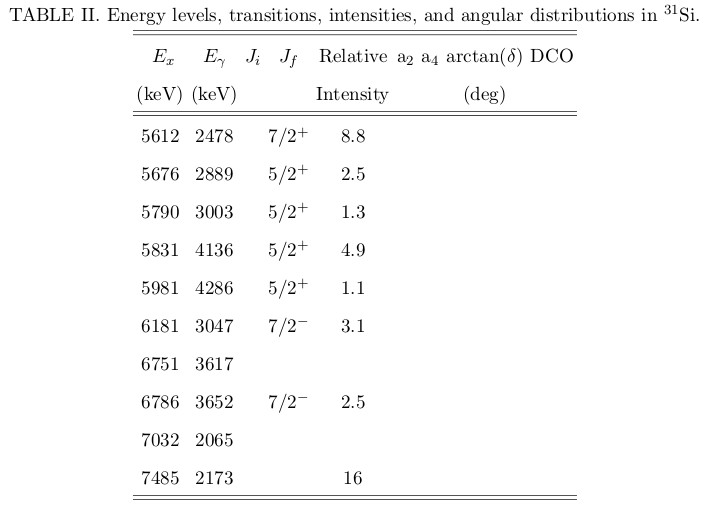
3.作不出revtex4-1的表格
在Lyx中表格的模型
但我想要得有的表格是有"雙刪除線"的那種
解決辦法:
我現在的作法是Lyx與texmaker以起混用,
像是一些equation還是Lyx中處理比較方便。
Lyx可以export它專用的.lyx檔成 .tex檔,然後再到texmaker程式中作微調。
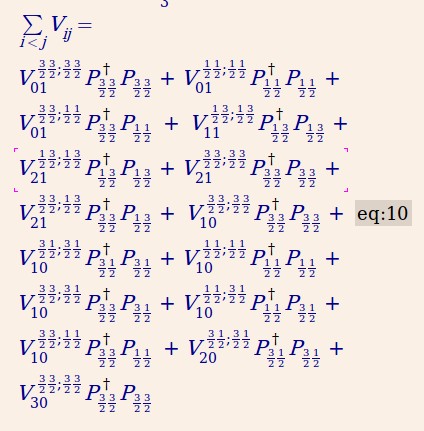
比方說:再texmaker中會看到眼花的方程式
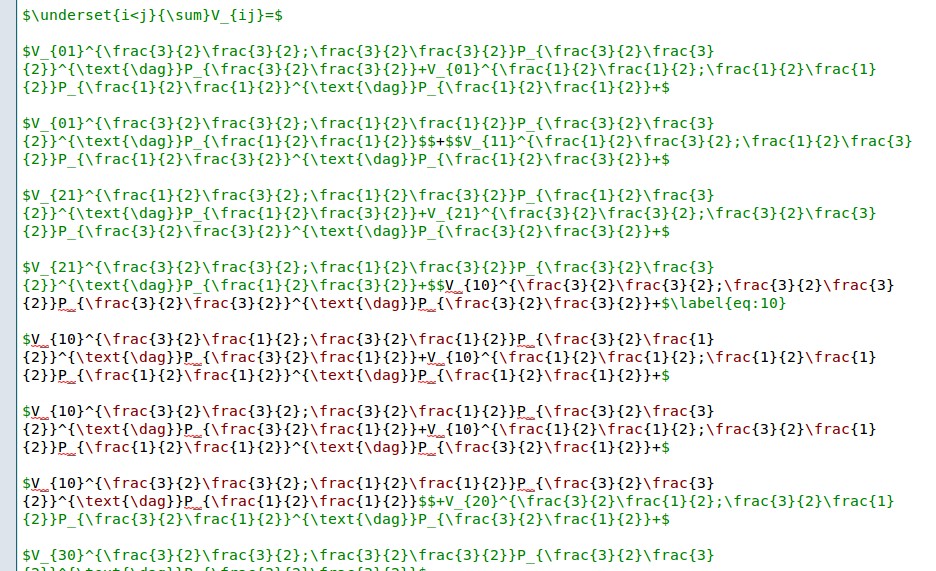
在Lyx中就顯得好操作多了(上面那團程式碼的成品就是這樣子)
本篇的內容:
網路上的Latex教學文件豐富而完整,
在學習的時候通常是先只要基本概念,遇到問題在去細查就好了。
這篇文章的重心將放在:
安裝Latex 與 revtex4-1,
還有簡略的一些說明,對於我們上面提到的:
-- 寫Title, authors ... 放圖片, 表格,...
我推薦的reading material
http://en.wikibooks.org/wiki/LaTeX (這邊的資料非常的豐富!也寫得很淺顯易懂)
The Not So Short Introduction to LATEX2ε
中文的 (由freePrester製作)
好~~我們就開始吧
以下,我用Ubuntu 11.10來作說明。
ps...我是用virtualbox, host是windows7, guest是Ubuntu.
SECTION 1: Install Latex and revtex4-1
在Linux下,要使用Latex與revtex,大家推薦的是裝texlive這個package.
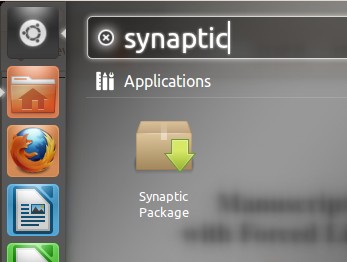
安裝的方法很簡單,使用synaptic去安裝很快就ok了
( 找不到synaptic的話,去ubuntu software中尋找加安裝就可以了)
open synaptic
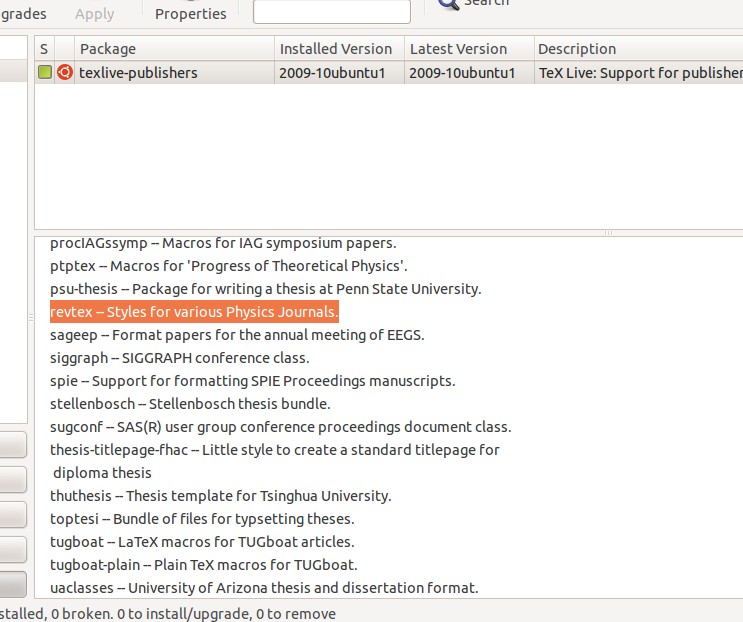
Search"revtex",
Install "texlive-publisher"package
SECTION 2: Compile the sample tex file.
當你安裝好"texlive-publisher" package之後,
它有附很多sample tex file, 讓我們來看一下關於revtex的sample檔吧,
基本上它的內容就是一個很好的參考資料或者是說範本。
它的檔案路徑在:
/usr/share/doc/texlive-publishers-doc/latex/revtex/sample/aps
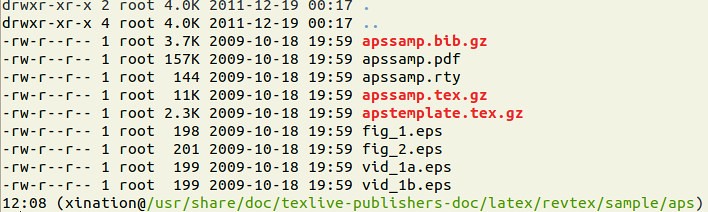
我們把這些資料copy到個新的資料夾去,然後去玩玩它。
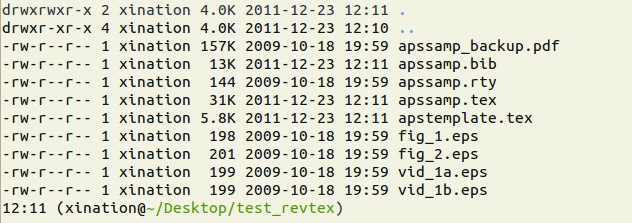
比方說,我在桌面新製了個資料夾叫"test_revtex",
然後把檔案都複製過來,接著我解壓縮(.gz的檔案是壓縮檔),
還有我將"apssamp.pdf" 重新命名為"appsamp_backup.pdf"
讓我們來試試看我們的Latex是否能work吧~
在terminal輸入 (under the test_revtex directory)
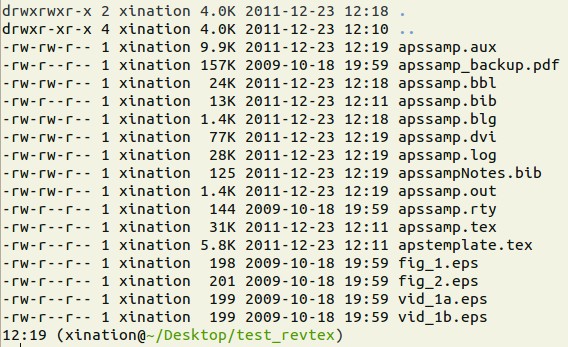
latex apssamp.tex
bibtex apssamp
latex apssamp.tex
latex apssamp.tex
(ps. latex 需要complie數次,所以最後兩個指令不是我多寫的,而是需要的)
弄好之後,你應該會看到多出了很多檔案
其中"apssamp.dvi"出來了~
那就恭喜你啦,你的revtex4-1可以工作啦。
(當我剛接觸revtex4-1時,光研究要怎麼安裝我就搞了2-3天晚上....)
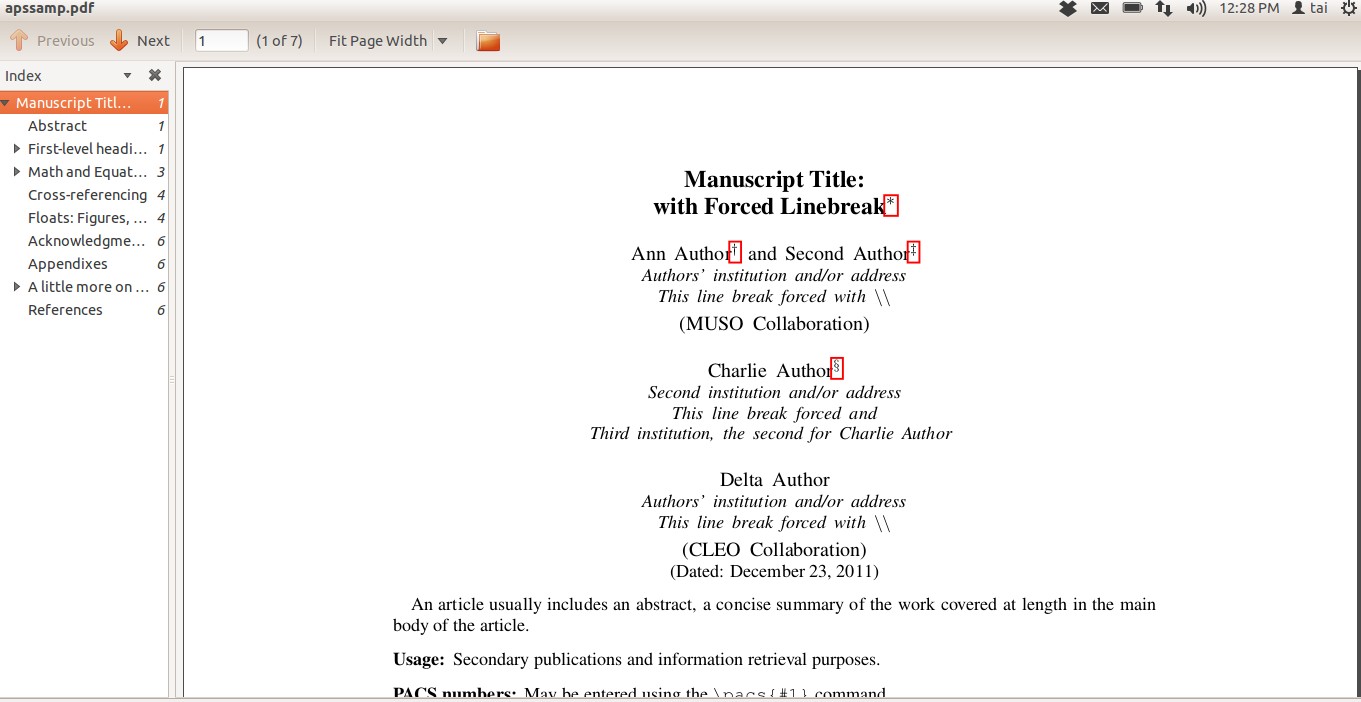
開啟 apssamp.dvi 使用command:
evince appsamp.dvi &
最後的&要加不加都不會有影響,
那是指另外開啟視窗,然後terminal還可以繼續用。

也可以作成pdf file,利用 command:
pdflatex apssamp.tex ; evince apssamp.pdf
在製作pdf的過程中,會出現一些詢問,可按eneter跳過。
SECTION 3-1: brief introduction -- Preamble
在.tex檔中,在文章開始之前,也就是\begin{document}之前,會有一段preamble,
那是設定documentclass與usepackage用的。
以下是我的設定:
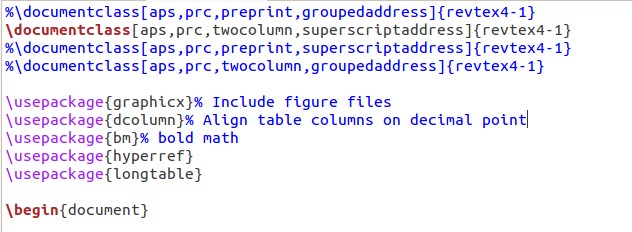
"%" 的符號代表註解
另外這是用gedit開起.tex看到的樣子,color code與texmaker會有些不同。
這邊的參數
aps, 是指 american physics soceity的規定
prc: physics review C 期刊的格式
( prl: physic review letter 期刊的格式)
twocolumn: 兩行的模式; 用於最後出版的
preprint: 單行模式; 用於peer-reviewing 比較好檢查錯誤
APS 還有寫好給 .bib 檔案(reference file)的style,
名為apsrev4-1.bst檔 (bst: bibliography style )
你只要要把apsrev4-1.bst 這個檔案放在相同的資料夾下,
在於打上下面這幾個字就可以了。
\bibliographystyle{apsrev4-1}
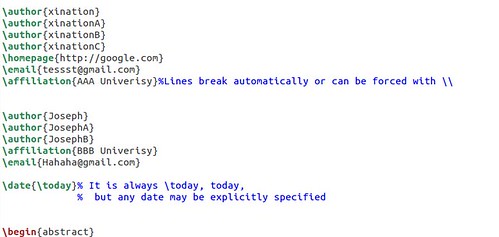
SECTION 3-2: brief introduction -- Authors, and Authors' information
在paper的最開始,最先的工作就是要放入基本資料了,這些資料也叫做Top matter.
Lyx在這部份作不出revtex4-1的格式,建議使用texmaker.
以下是我的設定:
成品(pdf):你看superscript自動出現了
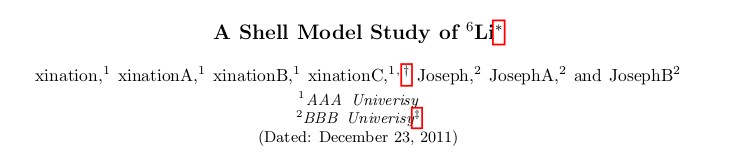
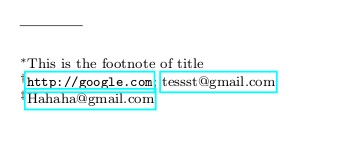
下面是email, homepage等等:
在revtex4.1
\author{A}
\author{B}
\affiliation{ XXX university}
這樣的話 author A 與 B就會被group 在同一個 affilliation之中了。
另外兩個實用的element是 email 與 altafilation
比方說
\author{A}
\email[ current email]{ OOO@gmail.com}
% [ ] 之內是放description, {} 之類是放value, like email address.
% 在頁面最下之處就會顯示出 作者A的email
\author{B}
\altafiliation{ present: UK}
% 是 alt + affiliation的意思,比方說某個作者畢業了,去新的地方工作,
% 那這資訊就可以放上去。
\date{\today}
% 會顯示日期,一般都是預設用today, 系統會自動顯示時間。
SECTION 3-3: brief introduction -- abstract
結構是:
\begin{abstract}
寫你想寫得內容...
ADB%#HSHWT...
\end{abstract}
下面是我的example
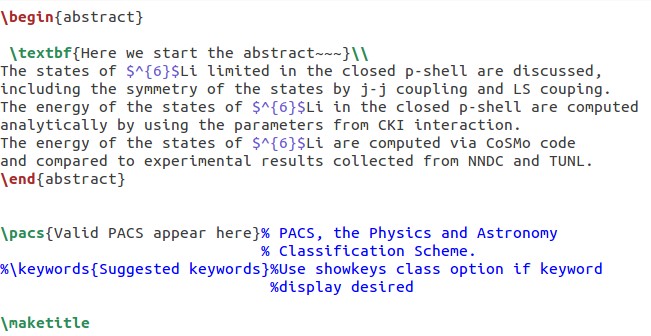
成品:
至於那個PACS不是你要填的,而是editor寫的,所以先劉者。。
在abstract結束後,還有個 \maketitle 的指令,
它是用來告訴Latex, 我們的title, author, date的設定都在上面完成了。
ps. The \maketitle command generates a title on a separate title page - except in the article style, where the title normally goes at the top of the first page.
SECTION 3-4: brief introduction -- structure
簡單的說大概長成這樣:
\documentclass[]{revtex4-1}
\bibliographystyle{apsrev4-1}
\begin{document}
\author{xination}
\affiliation{ XXX university}
\date{\today}
\begin{abstract}
\end{abstract}
\pacs{}
\maketitle
\section{這是第一段}
\subsection{還可以在細分}
\subsection{還可以在細分}
\section{這是第二段}
\subsection{還可以在細分}
\subsection{還可以在細分}
\section{我是第三段}
\subsection{還可以在細分}
\subsection{還可以在細分}
\begin{thebibliography}
\end{thebibliography}
\end{document}
另外Figure, Table, Eqation也是這樣的唷:
ex.
\begin{figure}
...一堆設定
\end{figure}
or
\begin{table}
...一堆設定
\end{table}
SECTION 3-5: brief introduction -- label
\label的功能我們常常看到唷。
比方說" Please refer to the Fig. IV.... Please see the Table II...., Please read P. 201..."
在Latex中的使用方法是:
先設定label, 在用ref
其中\ref{}的部份會被Latex給取代,換成數字或者
而\pagerref則會顯示頁數等等。
Section I
This is a string.\label{just a test string}
OK show me \ref{just a test string}.
在預設下會用section當作category,\ref{just a test string}會顯示 [I]
我們可以標示category, by fig(for figure), tab(for table), eq(for equation)
\label{fig: pie chart}
\label{fig: scatter chart}
\label{eg: Schrodinger equation}
這樣fig, table, eq 都會有各自的running index.
詳細的說明可以看在http://en.wikibooks.org/wiki/LaTeX/Labels_and_Cross-referencing
這邊只做很簡單的介紹:
my example:
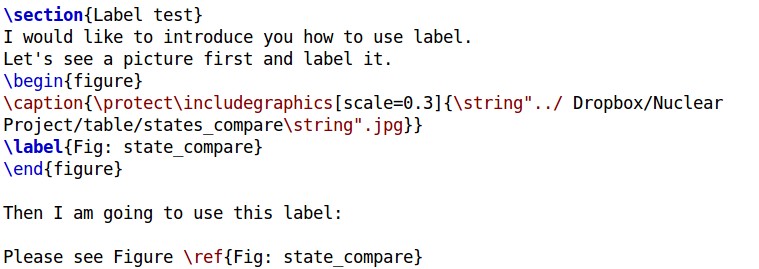
成品:
如果要讓label 運作正常,必須編譯兩次,第一次會出現???,那是正常的。
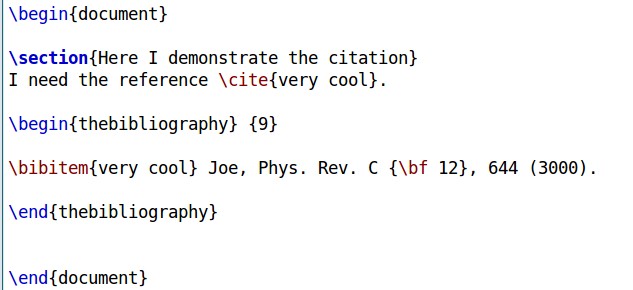
SECTION 3-6: brief introduction -- Citation and Reference
這邊先談最簡單、Latex內建的reference system
也就是embed reference in your .tex file.
更詳細的內容可以閱讀:http://en.wikibooks.org/wiki/LaTeX/Bibliography_Management
通常reference的位置都放在document的最後面
\begin{thebibliography}
\end{thebibliography}
\end{document}
它的基本語法為:
\begin{thebibliography} {9}
\bibitem{自己填的keyword1} C. Thibault, R. Klapisch, C. Rigaud, A. M. Poskanzer, R. Prieels, L. Lessard, and W. Reisdorf, Phys. Rev. C {\bf 12}, 644 (1975).
\end{thebibliography}
ps. {9}不是很重要,它是控制width的
要引用的時候,只要輸入 \cite{自己填的keyword1}就可以了
The XXX experiment discovered OOOO \cite{自己填的keyword1}.
example:
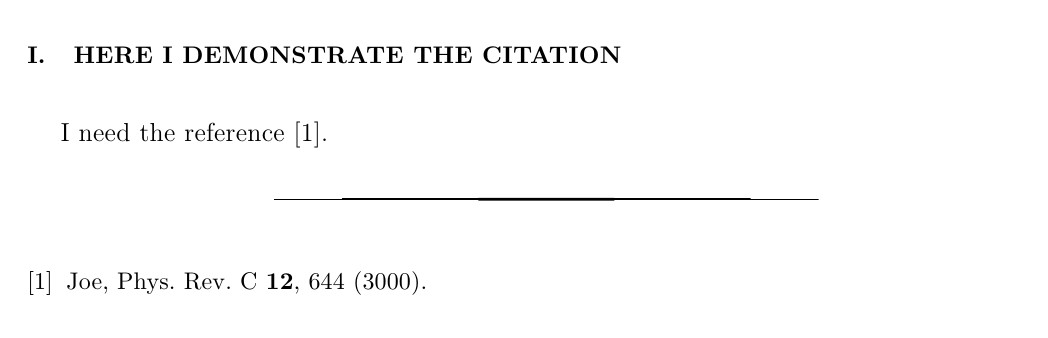
另外個比較多人使用的方法是用 .bib file, 也就是external reference file.
我們把reference 與本文分出來,放在專屬的.bib上。
一般期刊都會自己提供好bib的內容,
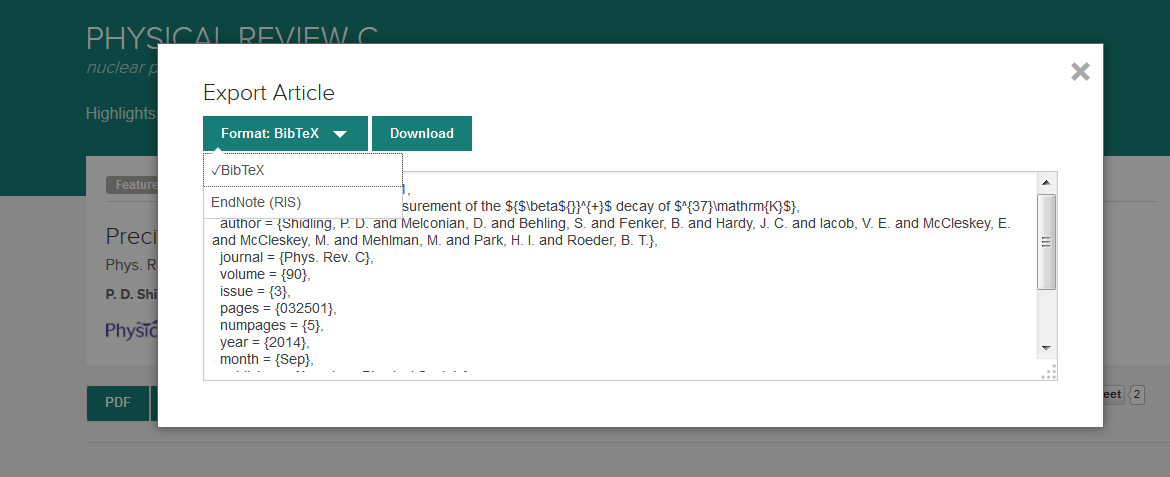
複製好貼上.blb file (他是個純文字檔)
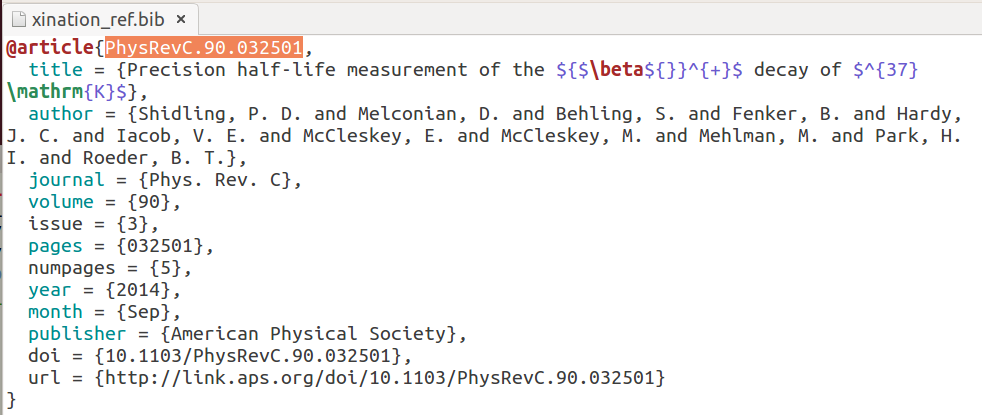
在這個example中,他的keyword, 預設是PhysReV.90.032501
在使用上,同樣用 \cite{PhysReV.90.032501}就可以了。
我們不在使用 "the bibliography"的environment
\begin{thebibliography}
\end{thebibliography}
而是改用呼叫external .bib file.
\bibliography{your bib file}
如果你的檔名是paper.bib,填入的是\bibliography{paper} 不用加副檔名。
注意,使用external bibtex的時候,一定要編譯bibtex
latex apssamp.tex
bibtex apssamp
latex apssamp.tex
latex apssamp.tex
不然是會有問號出現的唷
subsection A: using bibtex under Lyx
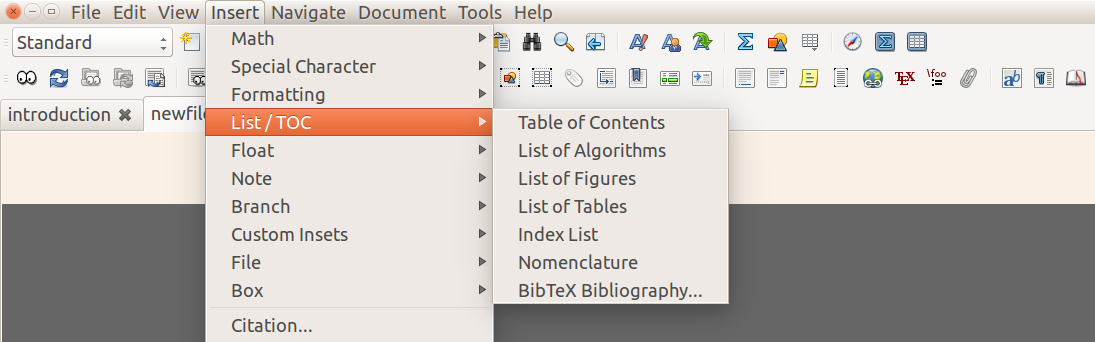
Lyx 下都是圖形界面的,按一按就可完成設定。
我們在 menubar上的 Insert, 下拉選單中找到 List/TOC ( table of cotent)
在選單中找到 BibTex Bibliography
就可以插入reference list了,就像是一篇paper最後的reference部分。
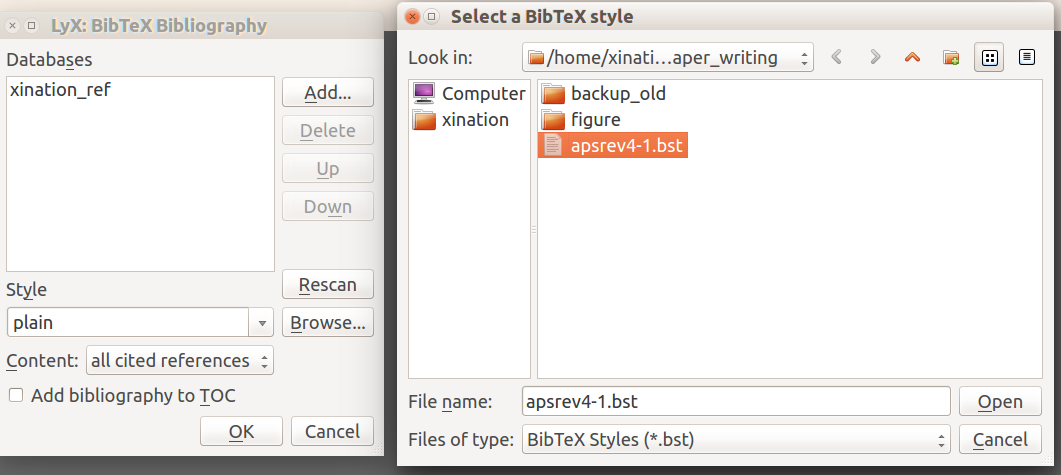
Lyx 會詢問你 Databases and style for .bib file.
首先按 Add

Then 用Browse找出你自己存取的.bib file.
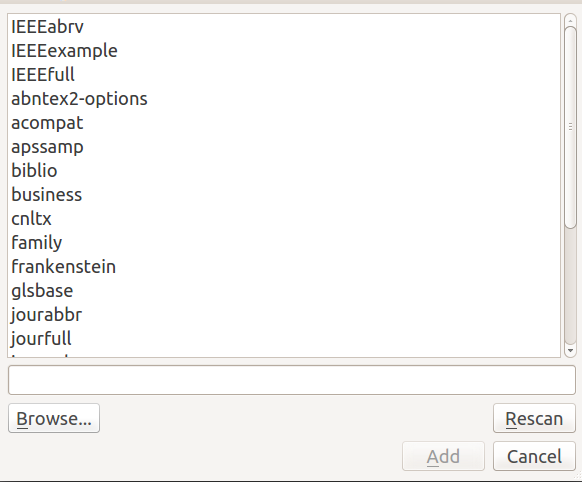
APS 有提供他們style file for .bib file; apsrev4-1.bst
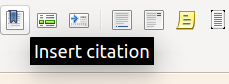
設定好了上面之後,要insert citation只要按個小圖示就好了。
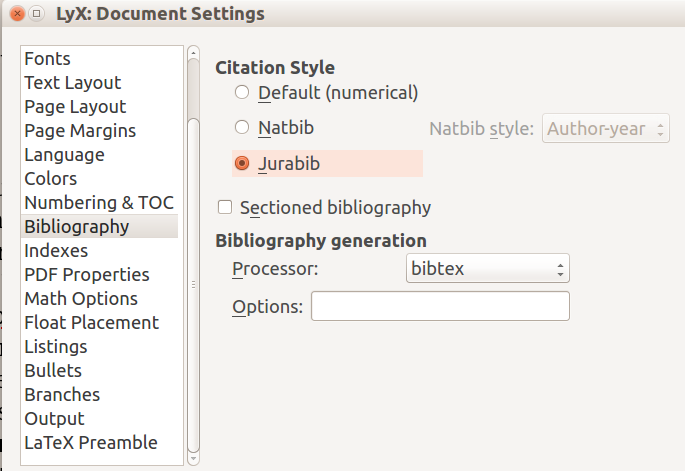
還有一個最後顯示上的小細節,在Document settings中 使用下面的設定。
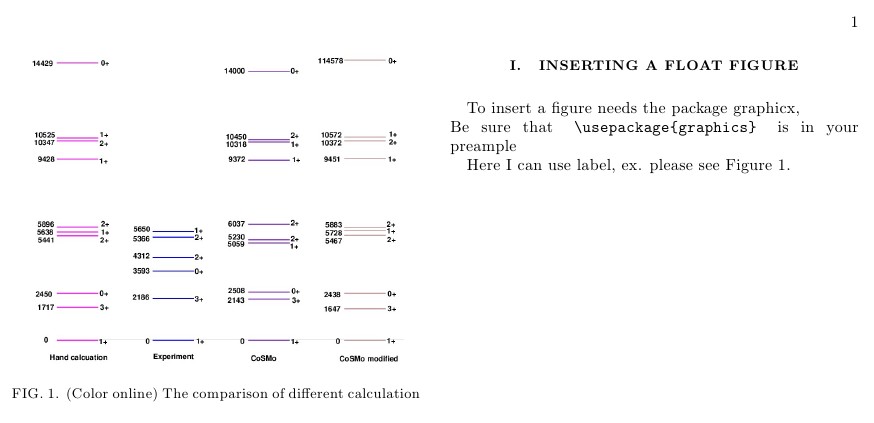
SECTION 3-7: brief introduction -- insert picture
圖片的插入有兩種,一種叫float,就是位置可以允許Latex程式幫你判斷,
然後Latex會幫你插入在最適當位置,尤其你圖檔比較大two column會有問題時,
用float比較方便。
另一種是固定式的,也就是你叫圖片一定要出現在安排的位置。
這邊只簡介float的方式
更詳細的說明可以看:http://en.wikibooks.org/wiki/LaTeX/Floats,_Figures_and_Captions
它的基本語法為:
\begin{figure*}
\begin{center}
\includegraphics[scale=.5]{file_path}
\caption{}
\label{}
\end{center}
\end{figure*}
{figure*}是給two column格式時用的,
scale是指要將原圖縮放的比例。
關於file path,比方說在你的tex檔的資料夾中,
你可以建立的figures的資料夾,然後把圖檔都放在裡面。
若你有個 abc.jpg 的圖檔
then file_path就是 figures/abc.jpg
也就是\includegraphics[scale=.5]{figures/abc.jpg}
通常 label 會放在 \caption{}之中,
像是caption{\label{fig:demo} the title of this figure.}
我的小小example

在Lyx中要使用float figure的話:
1) 先按insert->float->figure. 這樣會出現 float的environment,
用原始碼會是下面這樣:
\begin{figure*}
\caption{}
\end{figure*}
2) 先將滑鼠點到caption之外的地方,用下面的圖例表示,
就是Figure 4這幾個字的前面,插入圖片。
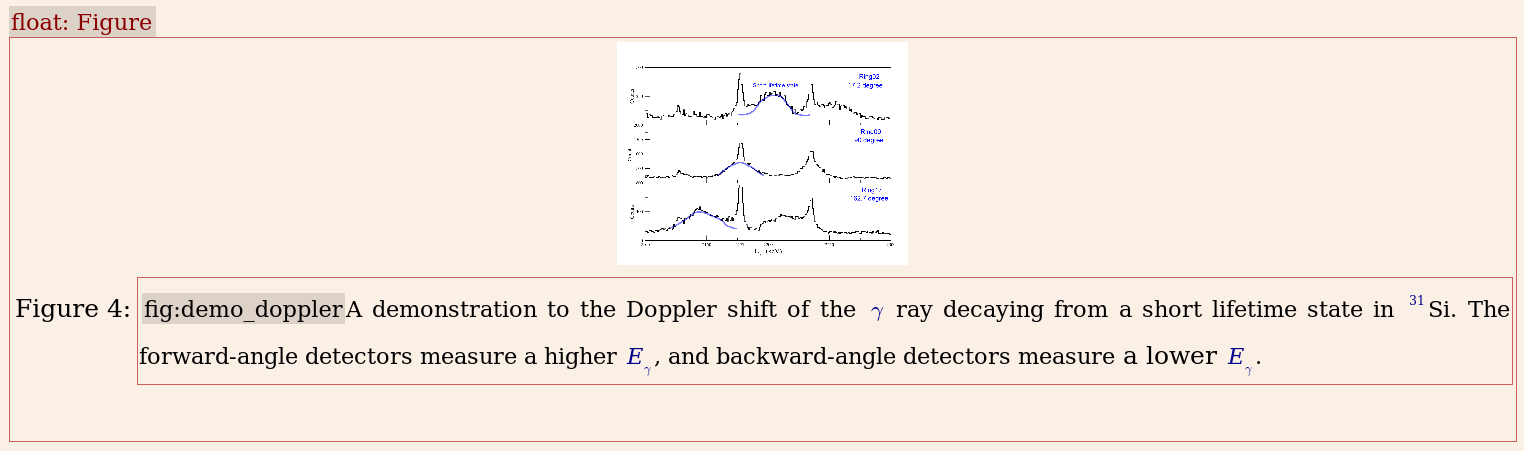
\begin{figure*}
\includegraphics[scale=.5]{demo.png}
\caption{this is tile}
\end{figure*}
3) 最後在全選框框裡面的東西,按右鍵用paragraph settings讓東西都置中
\begin{figure*}
\begin{center}
\includegraphics[scale=.5]{demo.png}
\caption{this is tile}
\end{center}
\end{figure*}
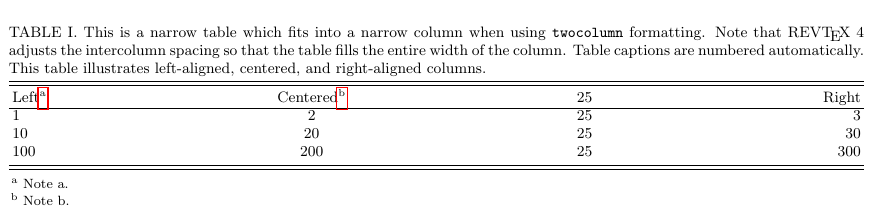
SECTION 3-8: brief introduction -- table and footnote
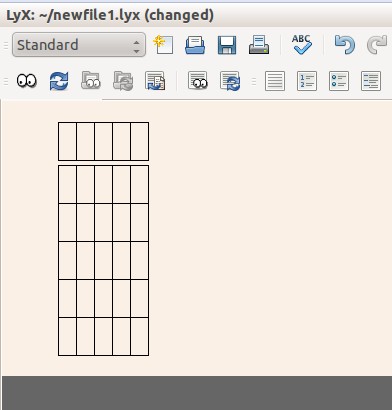
table的設計比較複雜,若有合併儲存格、形狀特殊的表格,那又更加麻煩了。
建議先在Lyx中設計出表格的架構,在把原始碼貼到texmaker去編輯。
或是參考 excel_to_latex 的plugin
這邊簡單介紹float的table,
更詳細的內容可以看:http://en.wikibooks.org/wiki/LaTeX/Tables
基本語法
& 為column separator
\\ 為 start new row
\hline 為horizontal line
ps. "\," 為小小的space,是為了fine tune用的。
ps. "~ "也是space,為了fine tune用的。
example1
\begin{tabular}{ l c r } %靠齊; l代表left, c代表center, r代表right
1 & 2 & 3 \\
4 & 5 & 6 \\
7 & 8 & 9 \\
\end{tabular}

note: tabular 是用來控制 element 靠左、置中、靠右的。
比方說 \begin{tabular} {lcr}
lcr 代表:
第一column中的elment靠左,
第二column中的elment置中,
第三column中的elment靠右。
example2
\begin{tabular}{ l | c || r | } %加了 pipe line "|" 就可以有solid line.
1 & 2 & 3 \\
4 & 5 & 6 \\
7 & 8 & 9 \\
\end{tabular}

example3
\begin{center} % 把表格置中
\begin{table}
\begin{tabular}{c c c}
\hline
\hline
A & B & C\\
\hline
1 &~~~~2~~~~~& 3 \\
4 & 5 & 6 \\
7 & 8 & 9 \\
\hline
\hline
\end{tabular} \label{tab:number}
\end{table}
\end{center}

在表格中,常常會看到出現footnote
這個語法很簡單,只要用\footnote就可以了
my example:
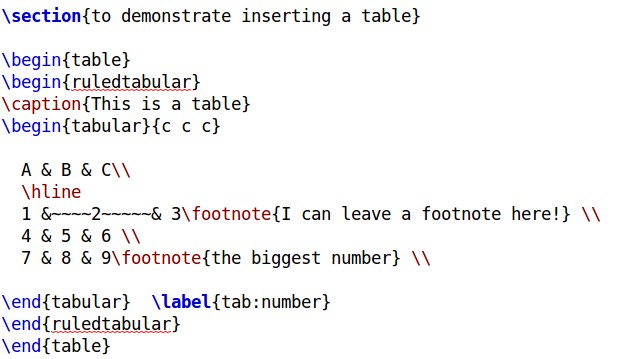
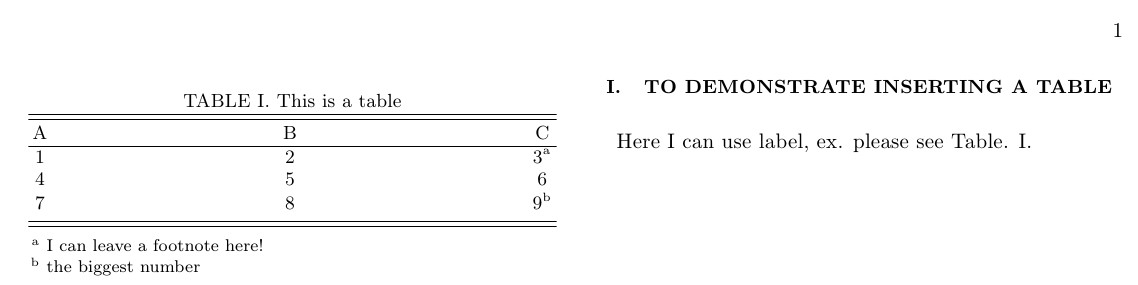
note: ruledtabular 是用來加入 double line的,他會自動出現在表格的最上與下方。
是在APS 期刊上經常使用的。
如果要在多個地方用同一個footnote.
ex.
term1a
term2a
term3b
term4b
要使用的footmaker, see following.
term1\footnote{ wowowow}
term2\footmaker[1]
term3\footnote{ hahahaha}
term4\footmaker[2]
table 太寬,就得用跨欄的方式,要使用float。
\begin{table*}
\end{table*}
還有像是excell儲存格合併,or跨欄置中的效果也是可以做到的。

使用 \multicolumn{2}{|c|}{AAAA} & B & C \\
SECTION 3-9: brief introduction -- equation
equation的說明在很多地方都有,這邊列出常見的math symbol.
在inline模式下是用$(some math)$
上下標:
Ax in latex: $A_{x}$
Ax in latex: $A^{x}$
Greek letter:
in latex: $\alpha$
in latex: $\beta$
You can also try the Online LaTex editor: check it.
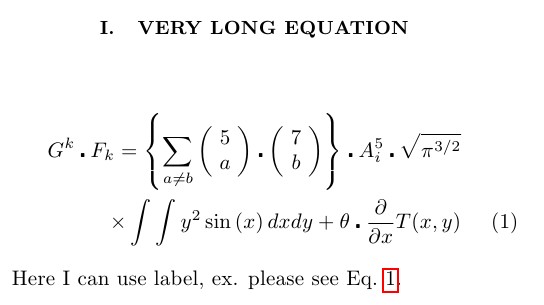
進階: super long equation如何放入two column的格式中。
打equation的話,我建議是到Lyx去打,
然後如果需要可以剪下他的code貼到texmaker上,尤其是複雜的。
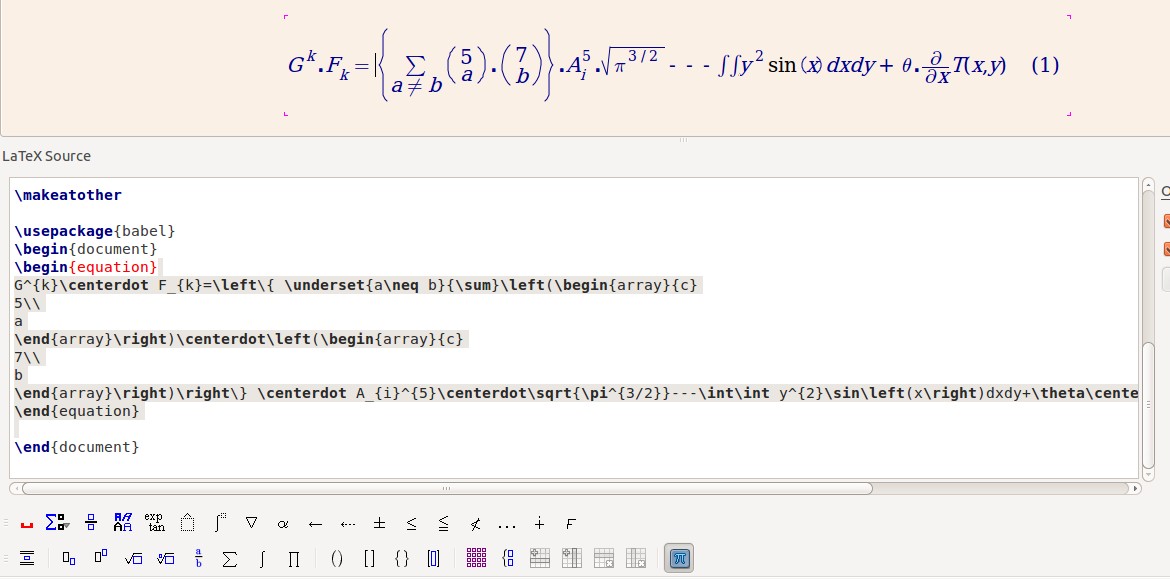
\begin{eqnarray}\label{eq:strange equation}
G^{k}\centerdot F_{k}=\left\{ \underset{a\neq b}{\sum}\left(\begin{array}{c}
5\\
a
\end{array}\right)\centerdot\left(\begin{array}{c}
7\\
b
\end{array}\right)\right\} \centerdot A_{i}^{5}\centerdot\sqrt{\pi^{3/2}}\nonumber\\
\times \int\int y^{2}\sin\left(x\right)dxdy+\theta\centerdot\frac{\partial}{\partial x}T(x,y)
\end{eqnarray}
首先別忘記要放package:
\usepackage{amsmath}
\usepackage{amssymb}
在
\begin{eqnarray}
\end{eqnarray}的環境下,是會幫equation給標號的。
當使用 \\ 來分段時,會變成兩個方程式,也就是會有equation (1), equation (2)。
我們得使用 \nonumber\\來分段
下面就
SECTION 4: 結語
洋洋灑灑寫了這麼多,希望能對為來也要查詢Latex資訊的人能有些小小貢獻。
我寫累了,就寫到這邊吧。之後有空在慢慢補充。
對了。還有15分鐘就12/25日了
Merry Christmas~~~
Appendix:
Lyx的教學影片
安裝篇
Lyx基礎的操作